
 iDVD
iDVD
iDVD Overview
iDVD is authoring software that allows you to easily create DVD projects on your Macintosh. iDVD is where you put together projects that you have already created in iPhoto or iMovie. It cannot create original projects, but rather is a container that allows you to present your other projects in a professional way. DVD technology is commonly found in many households across the country and is becoming more popular every day. iDVD is integrated with iTunes, iPhoto, iMovie and the other iLife applications.
 How Big is a DVD?
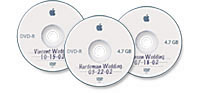
A DVD disc officially holds about 4.7 GB of data (actually 4.4 GB with formatting).
In comparison....
- A CD will hold 650 MB of data. (1000 MB = 1 GB)
- A zip disk holds about 100 MB of data.
- A floppy disk holds about 1.4 MB of data.
A DVD disc will hold about 60 minutes of video including video in motion menus.
iDVD will allow up to a total of 99 movies and slideshows (in any combination though length of video and numbers of photos will affect this).
What do you need to make a DVD?
You will need:
- Projects
- DVD-R or DVD-RW blank disc media
- Macintosh computer with a SuperDrive
- iDVD software
DVD Menus
You use menus to navigate through a DVD when you watch one. This is where you select to play a movie or watch the behind the scenes clips, etc. In iDVD, you will be creating the menus used to navigate to your iMovies, projects, and iPhoto slideshows.
iDVD Video Format
iDVD can create DVDs with video that is in either NTSC or PAL format. NTSC format is used in North America, Japan, and various other non-European countries. PAL format is used in most European countries.
DVD Terms
• |
authoring |
process of creating menus and adding content to your project |
• |
button | clickable area that takes you to different areas of your project |
• |
DVD-R | blank media used to burn your project onto, can be used once |
• |
DVD-RW | blank media used to burn your project onto, can be erased and reused |
• |
menu | a screen containing clickable buttons allowing you to navigate through the project |
• |
motion menu | a menu which contains a background image that is a movie and/or contains background audio |
• |
MPEG-2 | compression format used for video on a DVD |
iDVD Tabs
This is where most of the different options are stored. The iDVD window has four tab options
- Themes
- Menu
- Buttons
- Media

Themes
You can choose from a list of themes from iDVD 6, 5, 4, and older. There are a number of stylish themes to choose from. You can download more themes from sites such as Theme PAK which also offer additional themes for sale.
iDVD Theme PAK Free Themes
http://www.idvdthemepak.com/free.html

Menu
This is where you can customize menu settings for the menus in your project. Think of the menu as the choices you have available to choose from.
Buttons
This is where you can create buttons and change the settings for text size, font, button styles, background images, and sounds.
Media
You use this section to access content from other iLife programs such as iTunes, iPhoto, and iMovie. iDVD has really made it easy to access your projects and media from these other programs.
Creating a New Project
A new iDVD project will save as "Projectname.dvdproj". You determine where to save the project. There is not a default location.
Basic Steps
- Select a theme.
- Assemble the movies and photos to include in your project.
- Create the menus with links to each project.
- Preview your finished project. This can be done at any point throughout the process.
- Burn the final project to DVD-R or DVD+R media.
- Share your project.
iDVD Themes
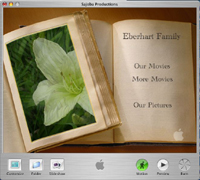
![]()
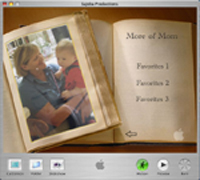
Select a theme. Many themes contain motion. Themes that contain motion menus have a motion icon on them.
Your menu or card in iDVD can contain a maximum of 6 buttons which link to movies, slideshows, or other submenus. Each submenu can also have up to 6 buttons. One DVD project can contain up to 30 menus. To add additional menus, click on the + button and choose Add Submenu. This will create an additional layer where you can add buttons.
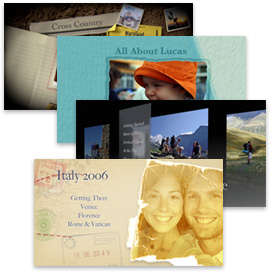
There are a number of themes included with iDVD. You can also create your own custom themes by dragging an image from iPhoto to your iDVD window. You can save customized themes for use with future projects.
There are websites with more DVD themes available for purchase or free download.
Drop Zones
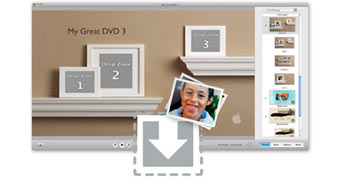
This is a special area in the theme where you can drag a movie or photos. This allows you to further customize your theme. You can add one iMovie to a drop zone. You can add up to 30 photos from iPhoto to a drop zone. It will play them like a slideshow. Once you have dropped items into the drop zone, you can move them around to position them.
Watch for the dotted line pattern as you drop your items into the drop zone. You want to make sure you are adding your effects to the drop zone vs. creating a new button linking to that item. You can remove items from the drop zone by dragging the item out. When you release the mouse button, it will disappear in a puff of smoke.
Adding a Movie
Click on the + button and select Add a Movie. Click on the movies tab on the Media drawer. It will go to the Movies folder of your Home Directory. Drag the movie that you want onto the button you just created. In the iDVD preferences you can also add other locations where you have movies stored to the list. Movies created in iMovie will have a small iMovie icon next to them. You can preview the movies in the drawer by clicking on the triangle at the bottom or by double clicking on the movie icon.
Drag the movie onto the menu area (not the drop zone) and iDVD will create a button for it. If your movie contains DVD chapter markers ( you can add these in iMovie 3+), it will create two buttons, one for Play Movie and Scene Selection.
You can burn any kind of QuickTime movie onto iDVD. The DVD standard size is 720 X 480 pixels.
You can add movies created in iMovie or Final Cut Pro.
You can actually burn up to 90 minutes of video on a DVD but anything over 60 minutes will be compressed at a higher rate and will reduce the quality. It is recommended to keep your project at under 60 minutes of video.
Adding a Slideshow
You can add slideshows from your photo albums in iPhoto. Click on the + button and choose Add Slideshow. Double click on the new button to open the slideshow window. You can drag photos from your iPhoto library via the Media tab into the Slideshow window. You can also customize any settings for your slideshow.
 Preview
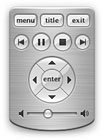
You can preview your project anytime while you are working on it. When you are previewing your DVD project, use the DVD remote control just like you would on your DVD player on your TV.
Motion
This is where you turn on the motion menus so that you can preview your project. You can turn this off while you are working so that iDVD will run faster. Turn it on whenever you want to preview something and also make sure you turn it on before burning your DVD.
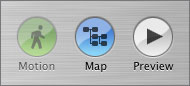
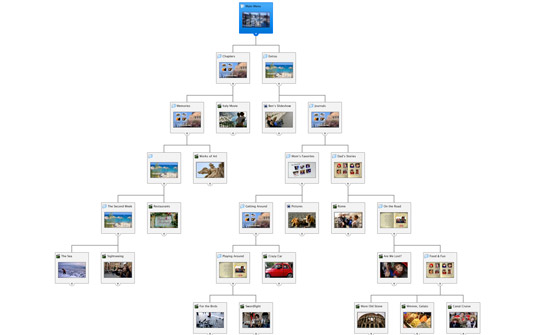
Map View
Map View allows you to quickly see the hierarchical layout of your project. You cannot do anything in Map View, it is merely a place to look at your project. There is one exception to this. You can add a movie to the Drop Box on the top left of the screen and that movie will start to play automatically when you insert the DVD. The Map View will also display small icons to let you know what kind of media is associated with each page.
Burning a DVD
Burn a DVD of your project only when you are finished. While the price is coming down, they are still more expensive than CD media. Use the Preview button to look over your project prior to burning your DVD. Once you burn a DVD-R disc, you cannot reuse it.
Burning a DVD is processor intensive. You should not try to do other work while burning a DVD. If you are using a SuperDrive in a laptop, be sure to plug in to a power outlet prior to burning your DVD.
Before burning your DVD, make sure you have at least twice as much available disk space on your hard drive. iDVD will need the extra space to allow for encoding and burning your project.
If you have added Motion to your project, be sure to turn it on prior to burning your DVD.
A .dvdproj file is not normally a very large file. When you add content to your project, iDVD keeps track of the original location. When you get ready to burn your DVD, iDVD gathers the resources as part of the project. If you need to move your .dvdproj file to another computer in order to burn a DVD, you must save your project as an archived project.
Help
Apple - iLife - iDVD
http://www.apple.com/ilife/idvd/
iDVD - Apple Support
http://www.apple.com/support/idvd/
Apple Discussions - iDVD
http://discussions.apple.com/category.jspa?categoryID=128
Ken Stone - Authoring in iDVD 6 -- (Excellent resource!)
http://www.kenstone.net/fcp_homepage/idvd_6_stone.html
Books
Carlson, Jeff. iMovie HD 6and iDVD 6: (Visual Quickstart Guide), Peachpit Press, Berkeley, CA, 2006
ISBN: 0-321-42327-5
http://www.peachpit.com
Carlson, Jeff. iMovie HD and iDVD 5 for Mac OS X: (Visual Quickstart Guide), Peachpit Press, Berkeley, CA, 2005
ISBN: 0-321-33542-2
http://www.peachpit.com
Pogue, David. iMovie HD and iDVD 5: The Missing Manual, Pogue Press, O'Reilly, 2005
ISBN: 0-596-10033-7
http://www.missingmanual.com
Online Resources
iDVD Resources
Apple - iDVD - Start Your Project
http://www.apple.com/support/idvd/start.html
iDVD Theme PAK Free Themes
http://www.idvdthemepak.com/free.html
iDVD/DVD Burning FAQ's
http://www.macmerc.com/articles/Power_User_Monday_Tip_of_the_Week/187
iDVD 6 - Atomic Learning, Inc.
http://www.atomiclearning.com/idvd6

Educational Uses of iDVD
- Digital portfolios
- Training videos
- Preserve and share family videos and photographs
- Share multiple iLife projects with others